When we are playing some VR games, we often find a point in the middle of our view. If we move our head, that point will still stay in the middle, however, it can direct to different object. As VR developers we almost all need a UI system where the user can look at something and action it, such as a button. In this article, I am going to illustrate how to make this cursor and how to perform actions with this cursor.
Preparation
Firstly, you need to download the SDK from Google VR website. The url is (https://developers.google.com/vr/unity/download). After you have downloaded the SDK, new a unity 3D project. And then click, Assets->Import Package->Custom Package, and then click the “GoogleVRForUnity.unitypackage”. You need to import all the packages.
Make a cursor
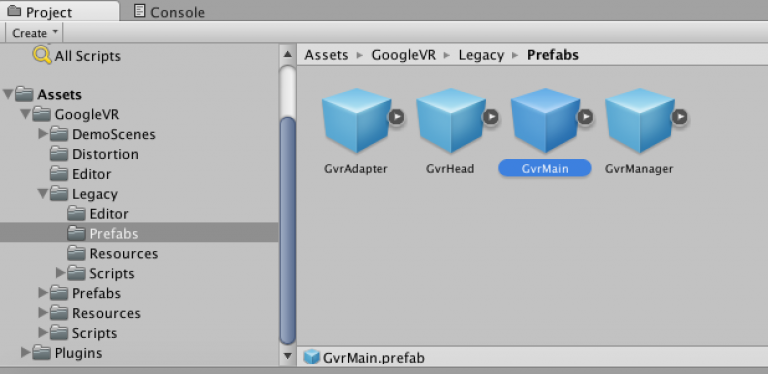
Firstly, delete the “Main Camera”. And then, drag the GvrMain(in the later 0.8 version, it is called GvrMain, before this version, it is called CardboardMain). GvrMain is in the directory of Assets->GoogleVR->Legacy->Prefabs:
You can set your position, as for me, I set x = 0, y = 1.5, z = 0. When you run the project, you may not see the sky. That’s because the camera’s clear flag is Solid color. In order to change that, Click GvrMain->Head->Main Camera, on the right side, you can see below the camera category, there is a property called “Clear Flags”. Change the value to “SkyBox”.
Then right click the left box to new a 3D Object called Plane. Then go to assets->googleVR->prefabs->UI, drag the GvrReticle to the leftBox. If you run the project, you will find that when you move your head the cursor doesn’t move. In order to let it move with your head, drag GvrReticle into the GvrMain->Head category. 🙂 We have a cursor successfully.
Gaze input
Now, we want to do some interactions with this cursor. Firstly, right click the left box to new a UI->EventSystem. Also, we need to new a 3D object->Cube as well.
For the EventSystem, click “Add component” and search for “gaze input module”. You will have the section as below:

You will also need to move this section up, just below theEvent System(script)
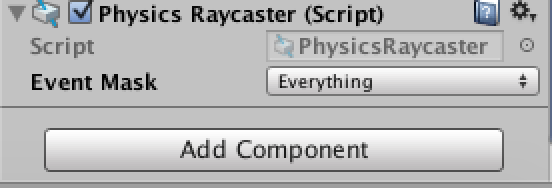
Then for the GvrMain->Head->Main camera, click “Add component” and search for “Physics Raycaster”. You will have the section as below:

The we need to create a script for the cube. Click add component for the cube, and create a script called “Moveup”(As any as you like).
Add these code, below the void Update(){}
Then save it. You also need to add the component “Event trigger(script)” for the object Cube. Add new type “Pointer Down”, and then click “+”. You can drag the title of that component to show that you want the cube object, then select the function MoveUp->MoveBoxUp.
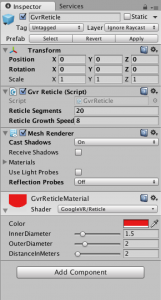
You are almost down, the last important thing is to change the settings for GvrReticle. The settings are below:

change the settings for Mesh Renderer.
Tips: If you want to change to color of the cursor, you can go
GvrReticleMaterial->Shader->Color for changing the color.
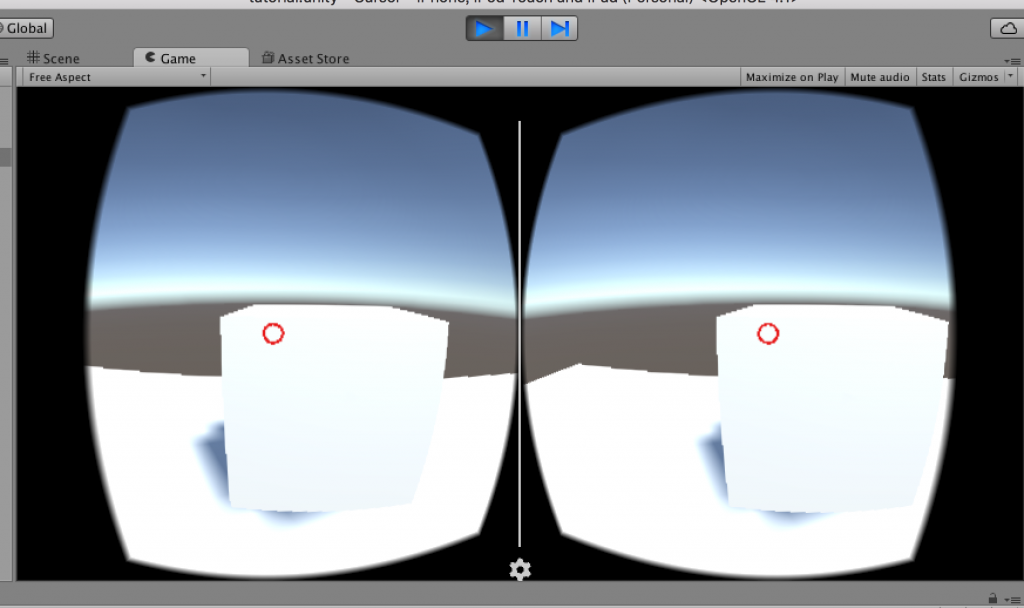
When you run this project, for mac user, hold on “option” and drag the scene, it will simulate that you are moving your head. When you let the cursor on the cube. It will be a circle. If you click, it can moveUp.

For Google Cardboard, if you want to perform the click action. You can drag the magnetic ring on the left side of your cardboard. Enjoy your VR tour. 🙂
Here is the code for this project: (https://github.com/Hanslen/Google_VR_cursor_gaze_input)
🙂