In this tutorial, I am going to illustrate how to set up your own Shadowsocks account. Before we start, you need a server, for me, I use the AWS. Then install Shadowsocks for that server.
Shadowsocks configuration:
sudo -s//Get the root permissionapt-get update//update the apt-getapt-get install python-pip//install python-pippip install shadowsocks//install shadowsocksvi /etc/shadowsocks.json//create a file, and add the following code12345678910{"server":"0.0.0.0","server_port":port,"local_address":"127.0.0.1","local_port":1080,"password":"password","timeout":300,"method":"aes-256-cfb","fast_open":false}
Don’t forget “”, that’s quite important.
ssserver -c /etc/shadowsocks.json -d start//start your shadowsocks
Server configuration:
Then you need to go to your EC2 Management Console, go to instances, and find your security groups, then click your security groups, Click Inbound->Edit. Because my port is 8388, so my settings are like these: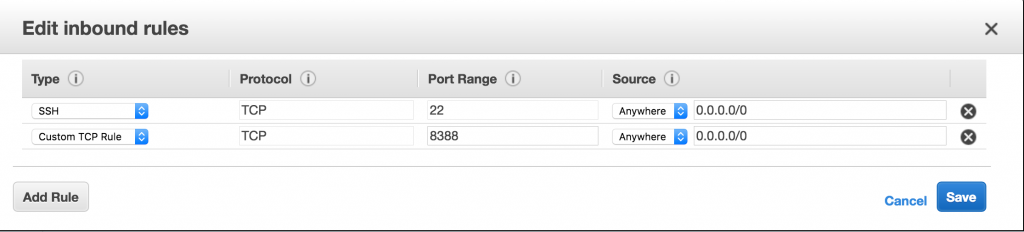
The port for your should be your /etc/shadowsocks.json.
Client configuration:
Here is a link for the shadowsocks:
Mac: http://dl.tudouvpn.com/ShadowsocksX-2.4.1.dmg
Then you open the server settings, address should be your elastic IP, port should be the server_port, method is "aes-256-cfb", password should be your own password. Well done. 🙂 We have finished.:-)