Note: I recommend using Hortonworks Sandbox instead…..
Install Hadoop with brew
Firstly, you need to check whether home brew has been installed or not, you can try
|
|
I will skip how to install home brew here.
Then, install hadoop with brew command:
|
|
The installation location of hadoop is ‘/usr/local/Cellar/hadoop’
Configuration
Go to usr/local/Cellar/hadoop/2.8.2/libexec/etc/hadoop. Under this folder, you will need to modify four files.
1. hadoop-env.sh
Change
|
|
to
|
|
2. core-site.xml
Then configure HDFS address and port number, open core-site.xml, input following content in <configuration></configuration> tag.
|
|
3. mapred-site.xml
Configure jobtracker address and port number in map-reduce, first sudo cp mapred-site.xml.template mapred-site.xml to make a copy of mapred-site.xml, and open mapred-site.xml, add
|
|
4. hdfs-site.xml
Set HDFS default backup, the default value is 3, we should change to 1, open hdfs-site.xml, add
|
|
Enable SSH
Check for files ~/.ssh/id_rsa and ~/.ssh/id_rsa.pubto verify the SSH localhost is enabled or not.
If these files does not exists then run the following command to generate them:
|
|
Enable Remote Login in (System Preference->Sharing), Just click “remote login”.
Then Authorize the generate SSH keys:
|
|
Test ssh at localhost:
|
|
If success, you will see:
|
|
If fail, you will see:
|
|
Format the hdfs
Format the distributed file system with the below command before starting the hadoop daemons. So that we can put our data sources into the hdfs file system while performing the map-reduce job.
|
|
Alias to start and stop Hadoop Daemons
Now, we need to go to /usr/local/Cellar/hadoop/2.8.2/sbin/ to start and stop hadoop services. And it is quite inconvienient, to make it easier we can create alias:
Edit ~/.bash_profile and add
|
|
Then run
|
|
Run Hadoop
Start hadoop with
|
|
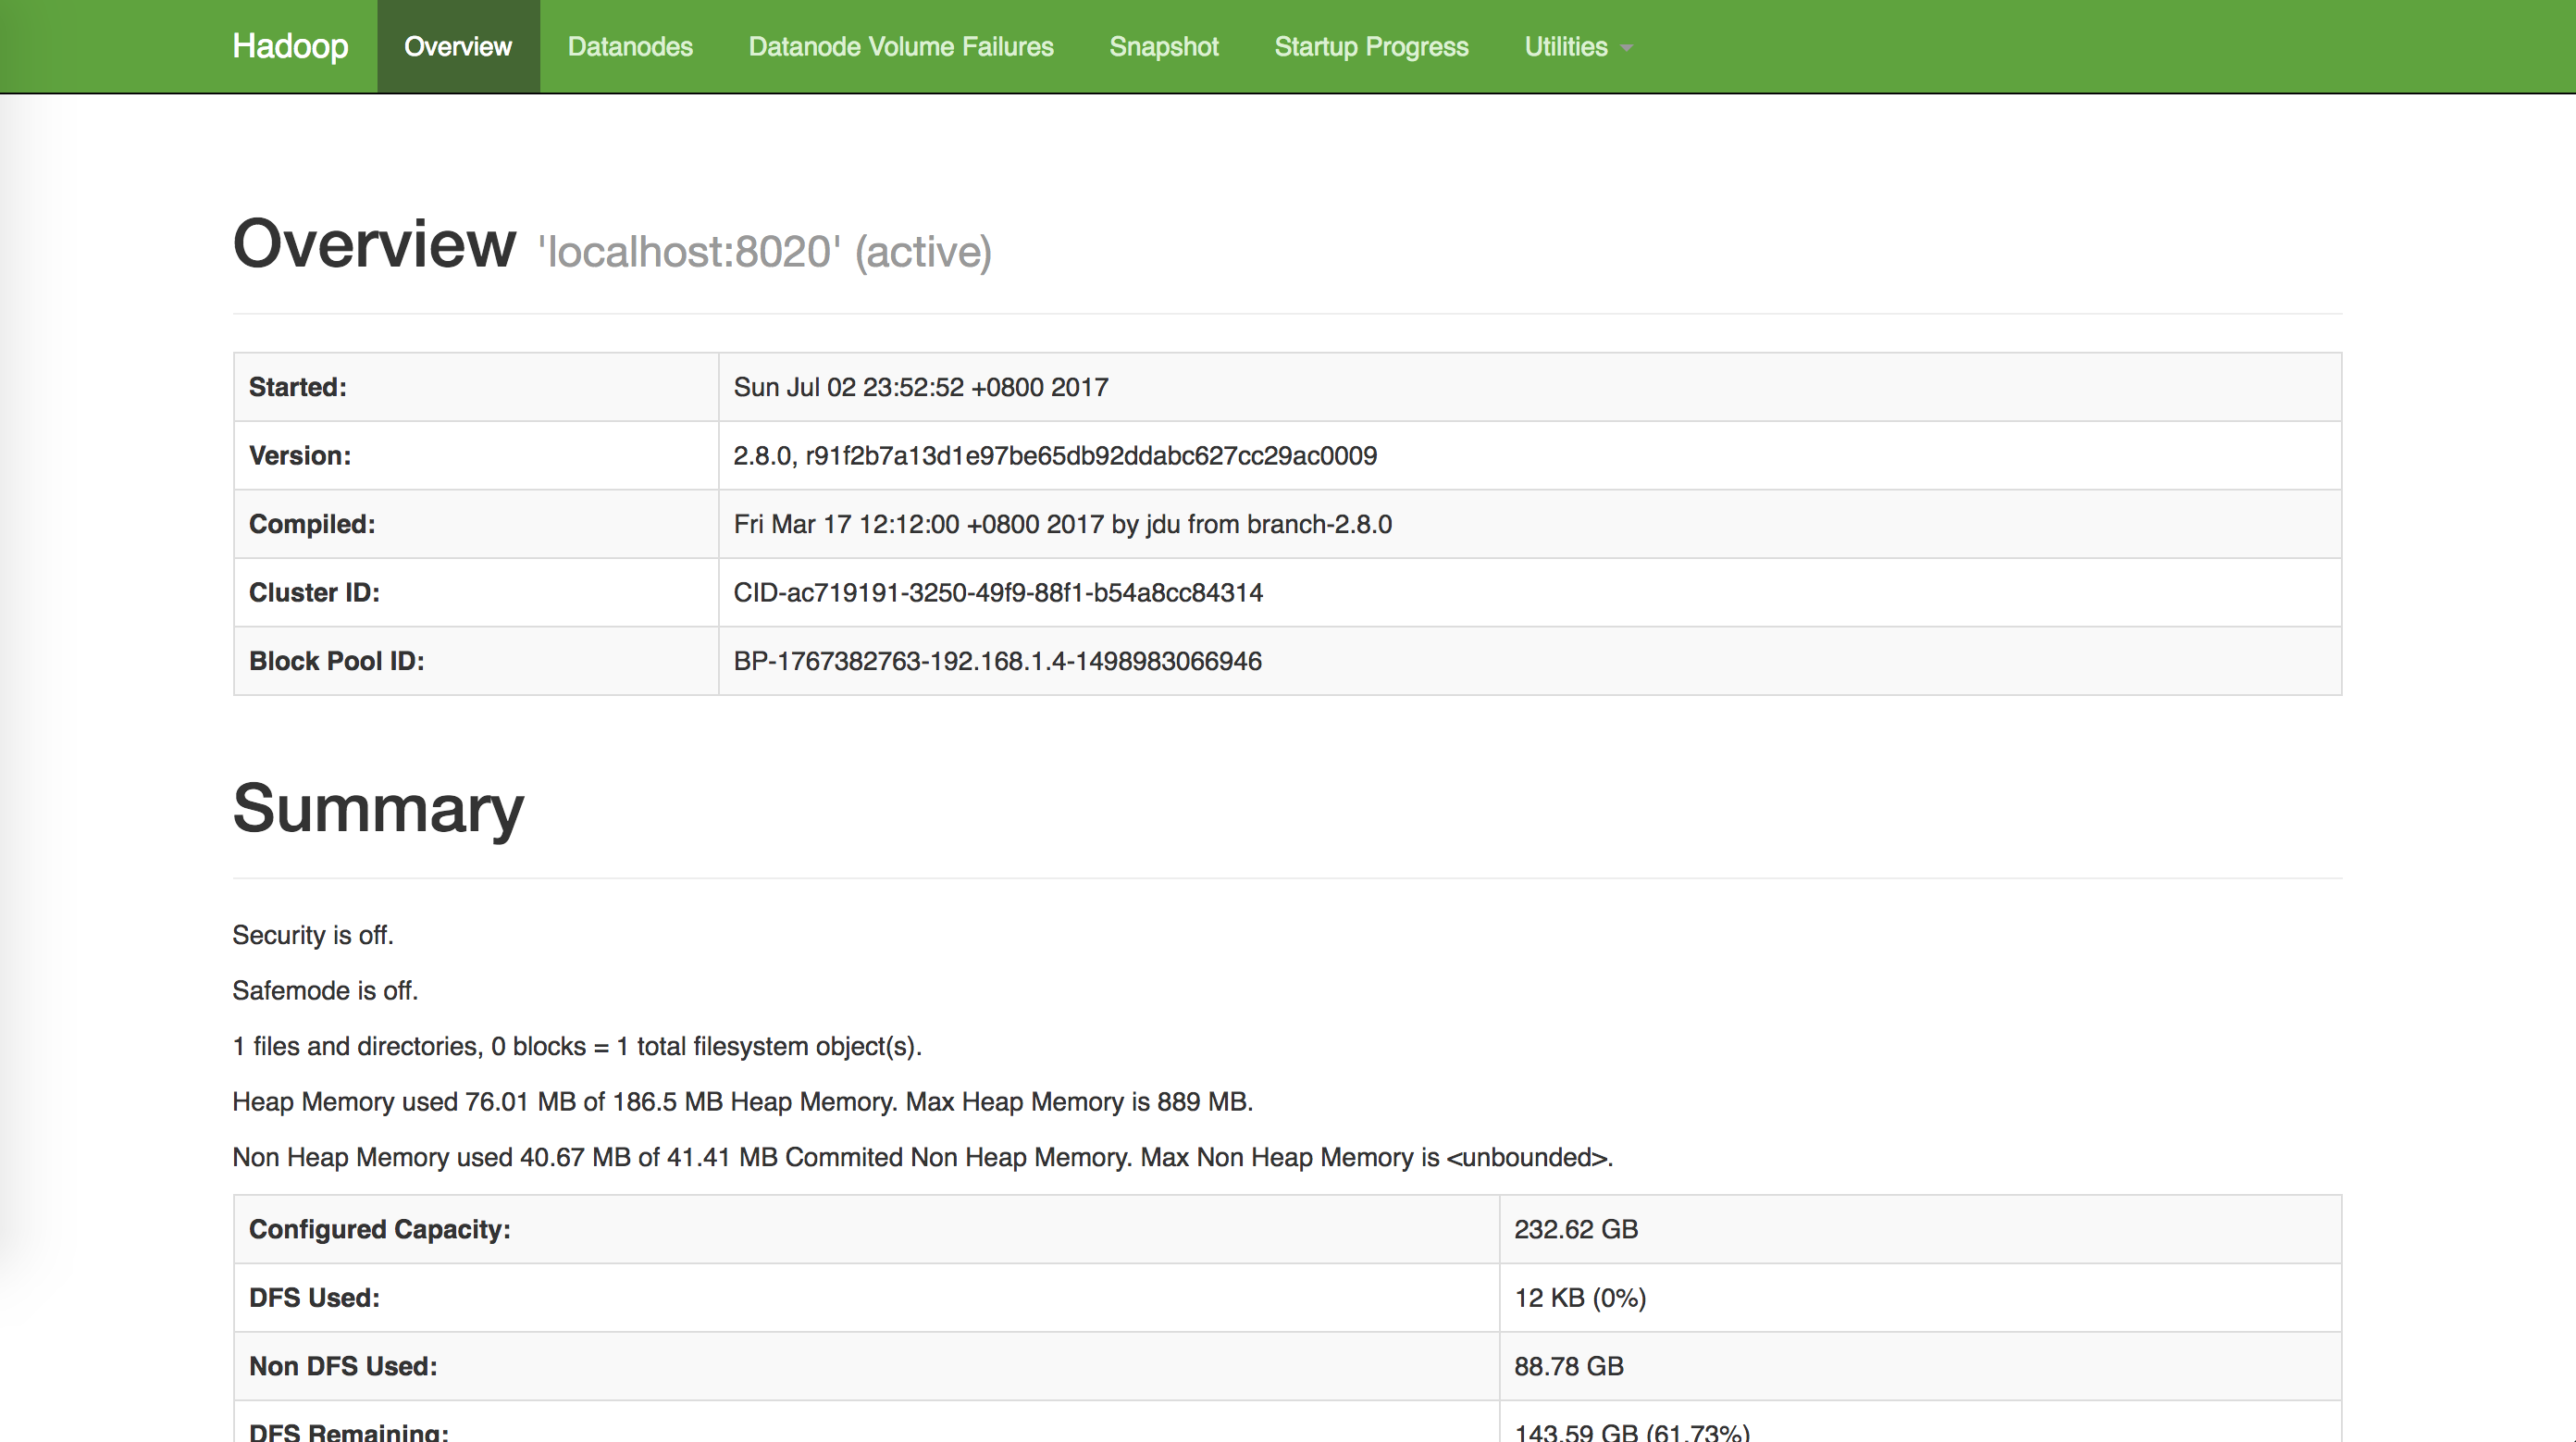
In the browser, when your url is http://localhost:50070 you can see the following page:
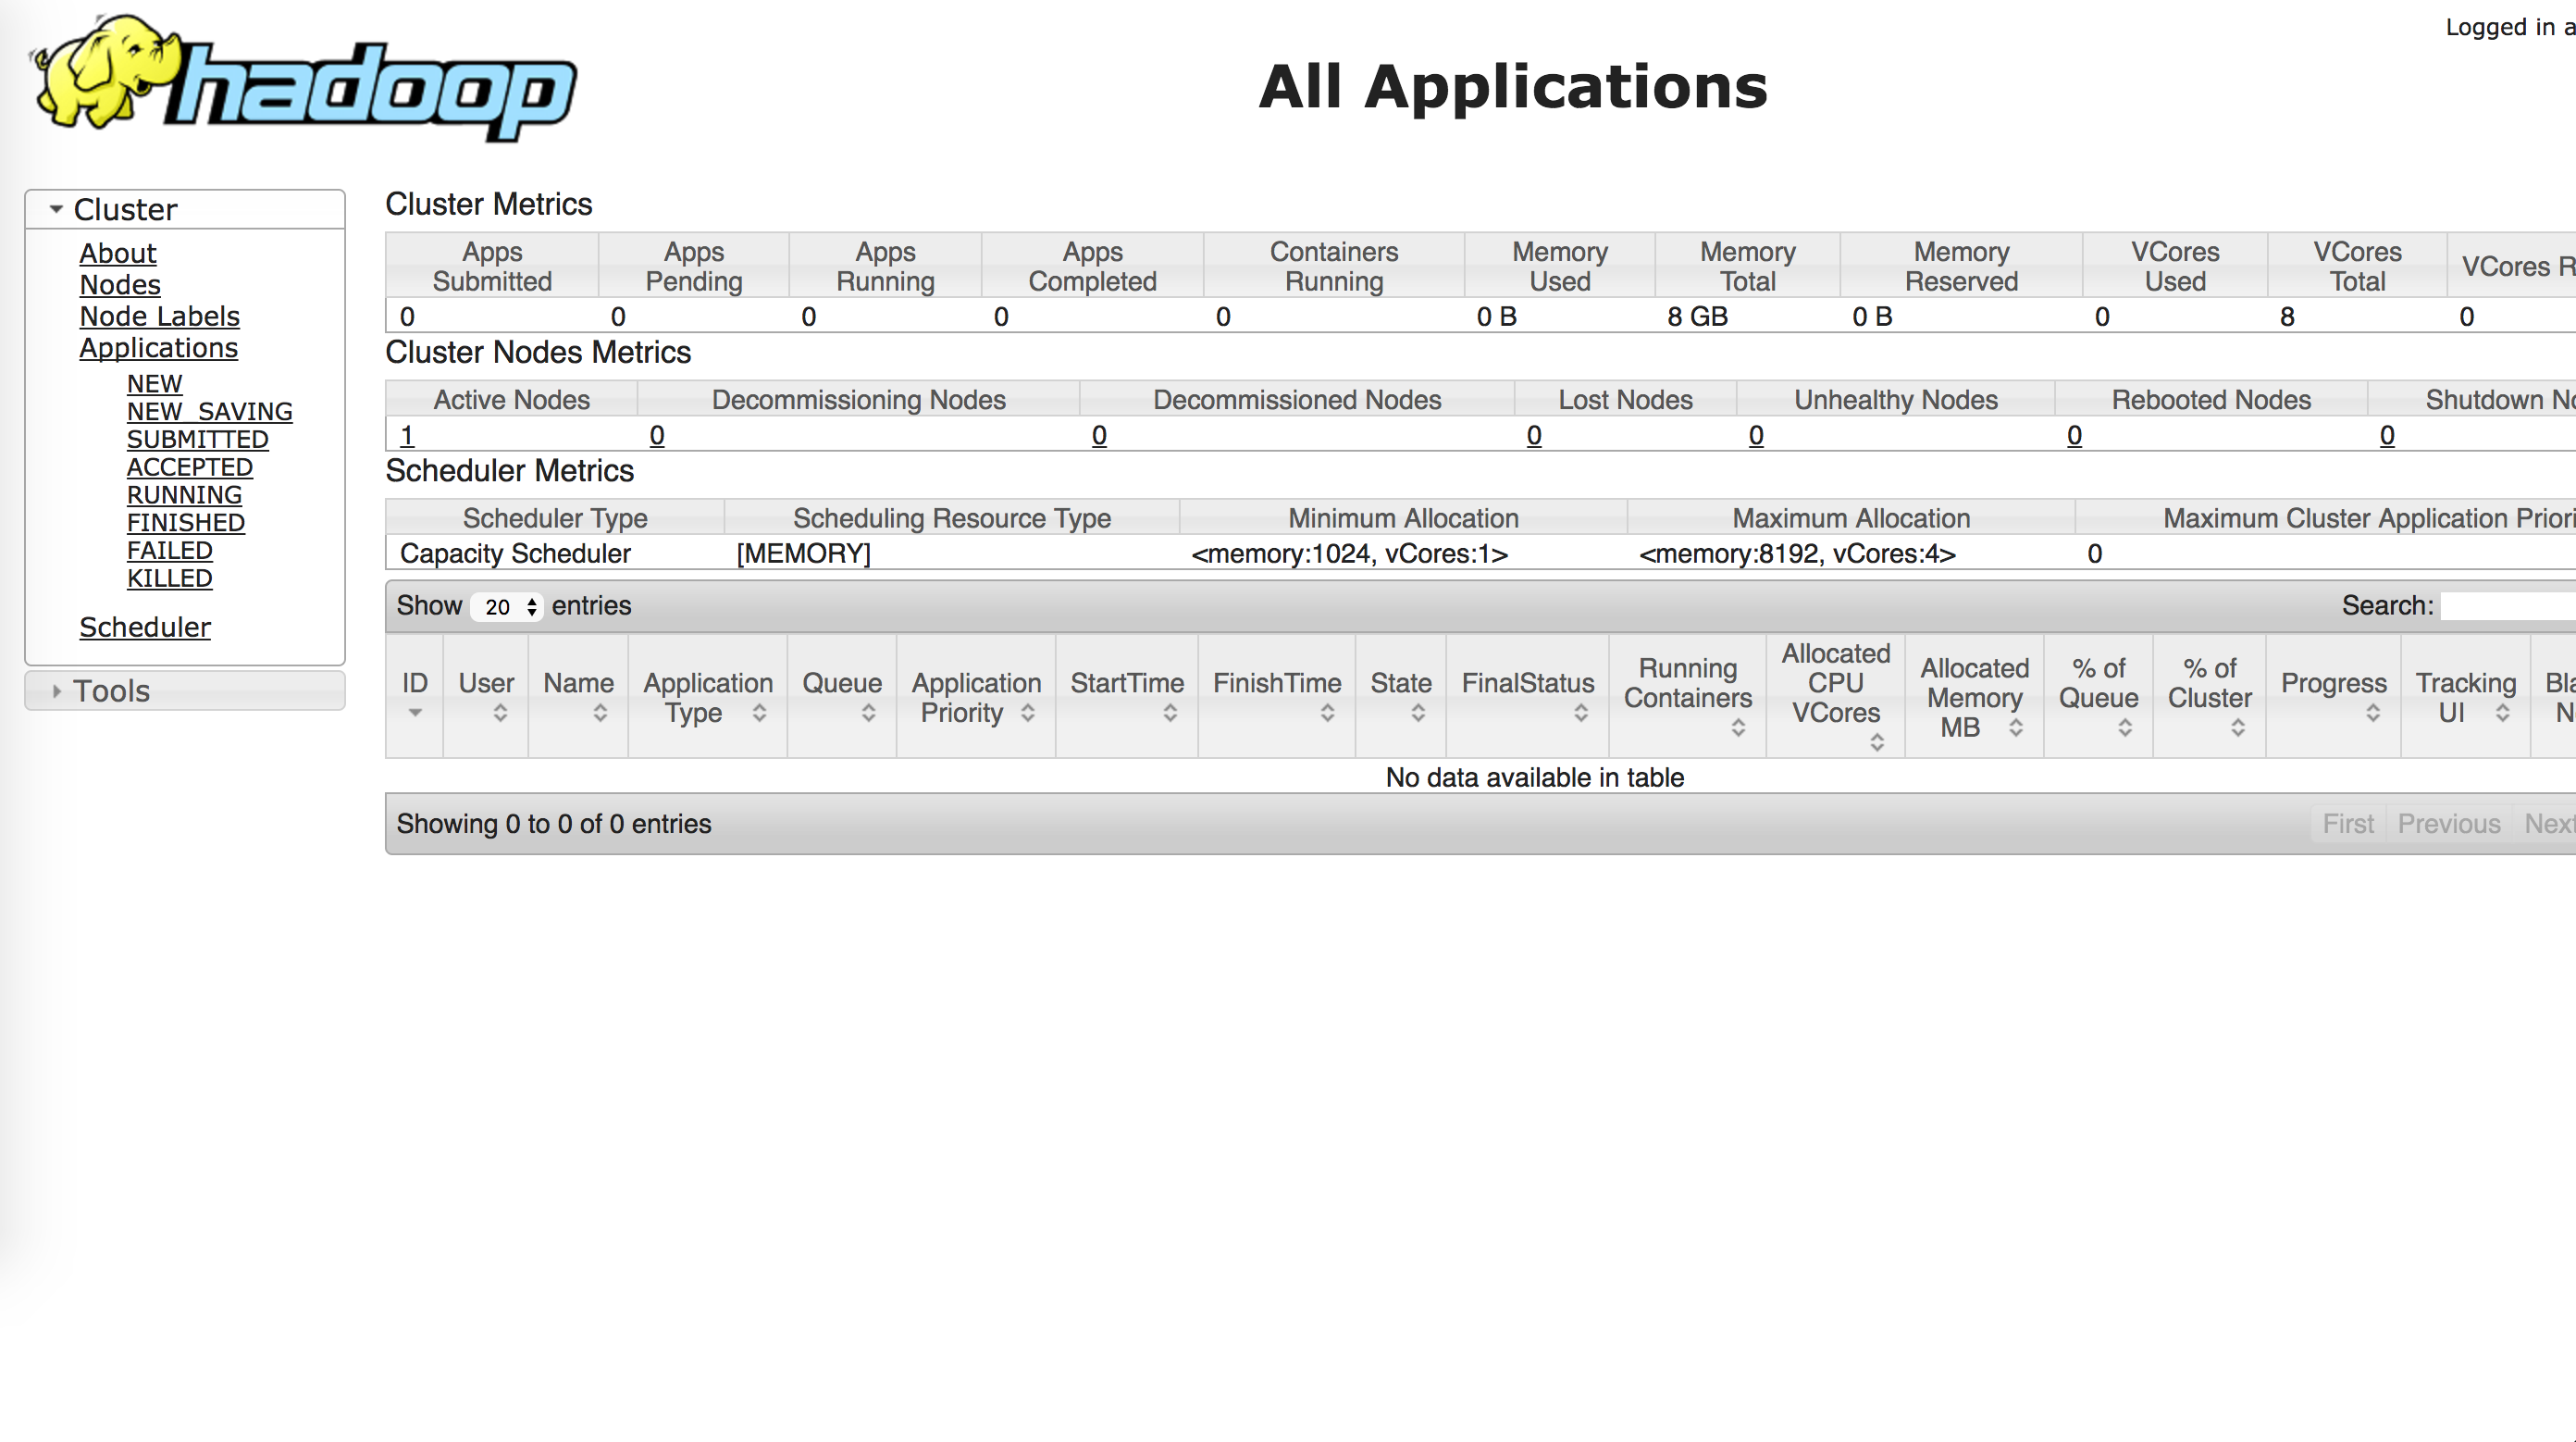
Also, you can see the JobTracker as well.
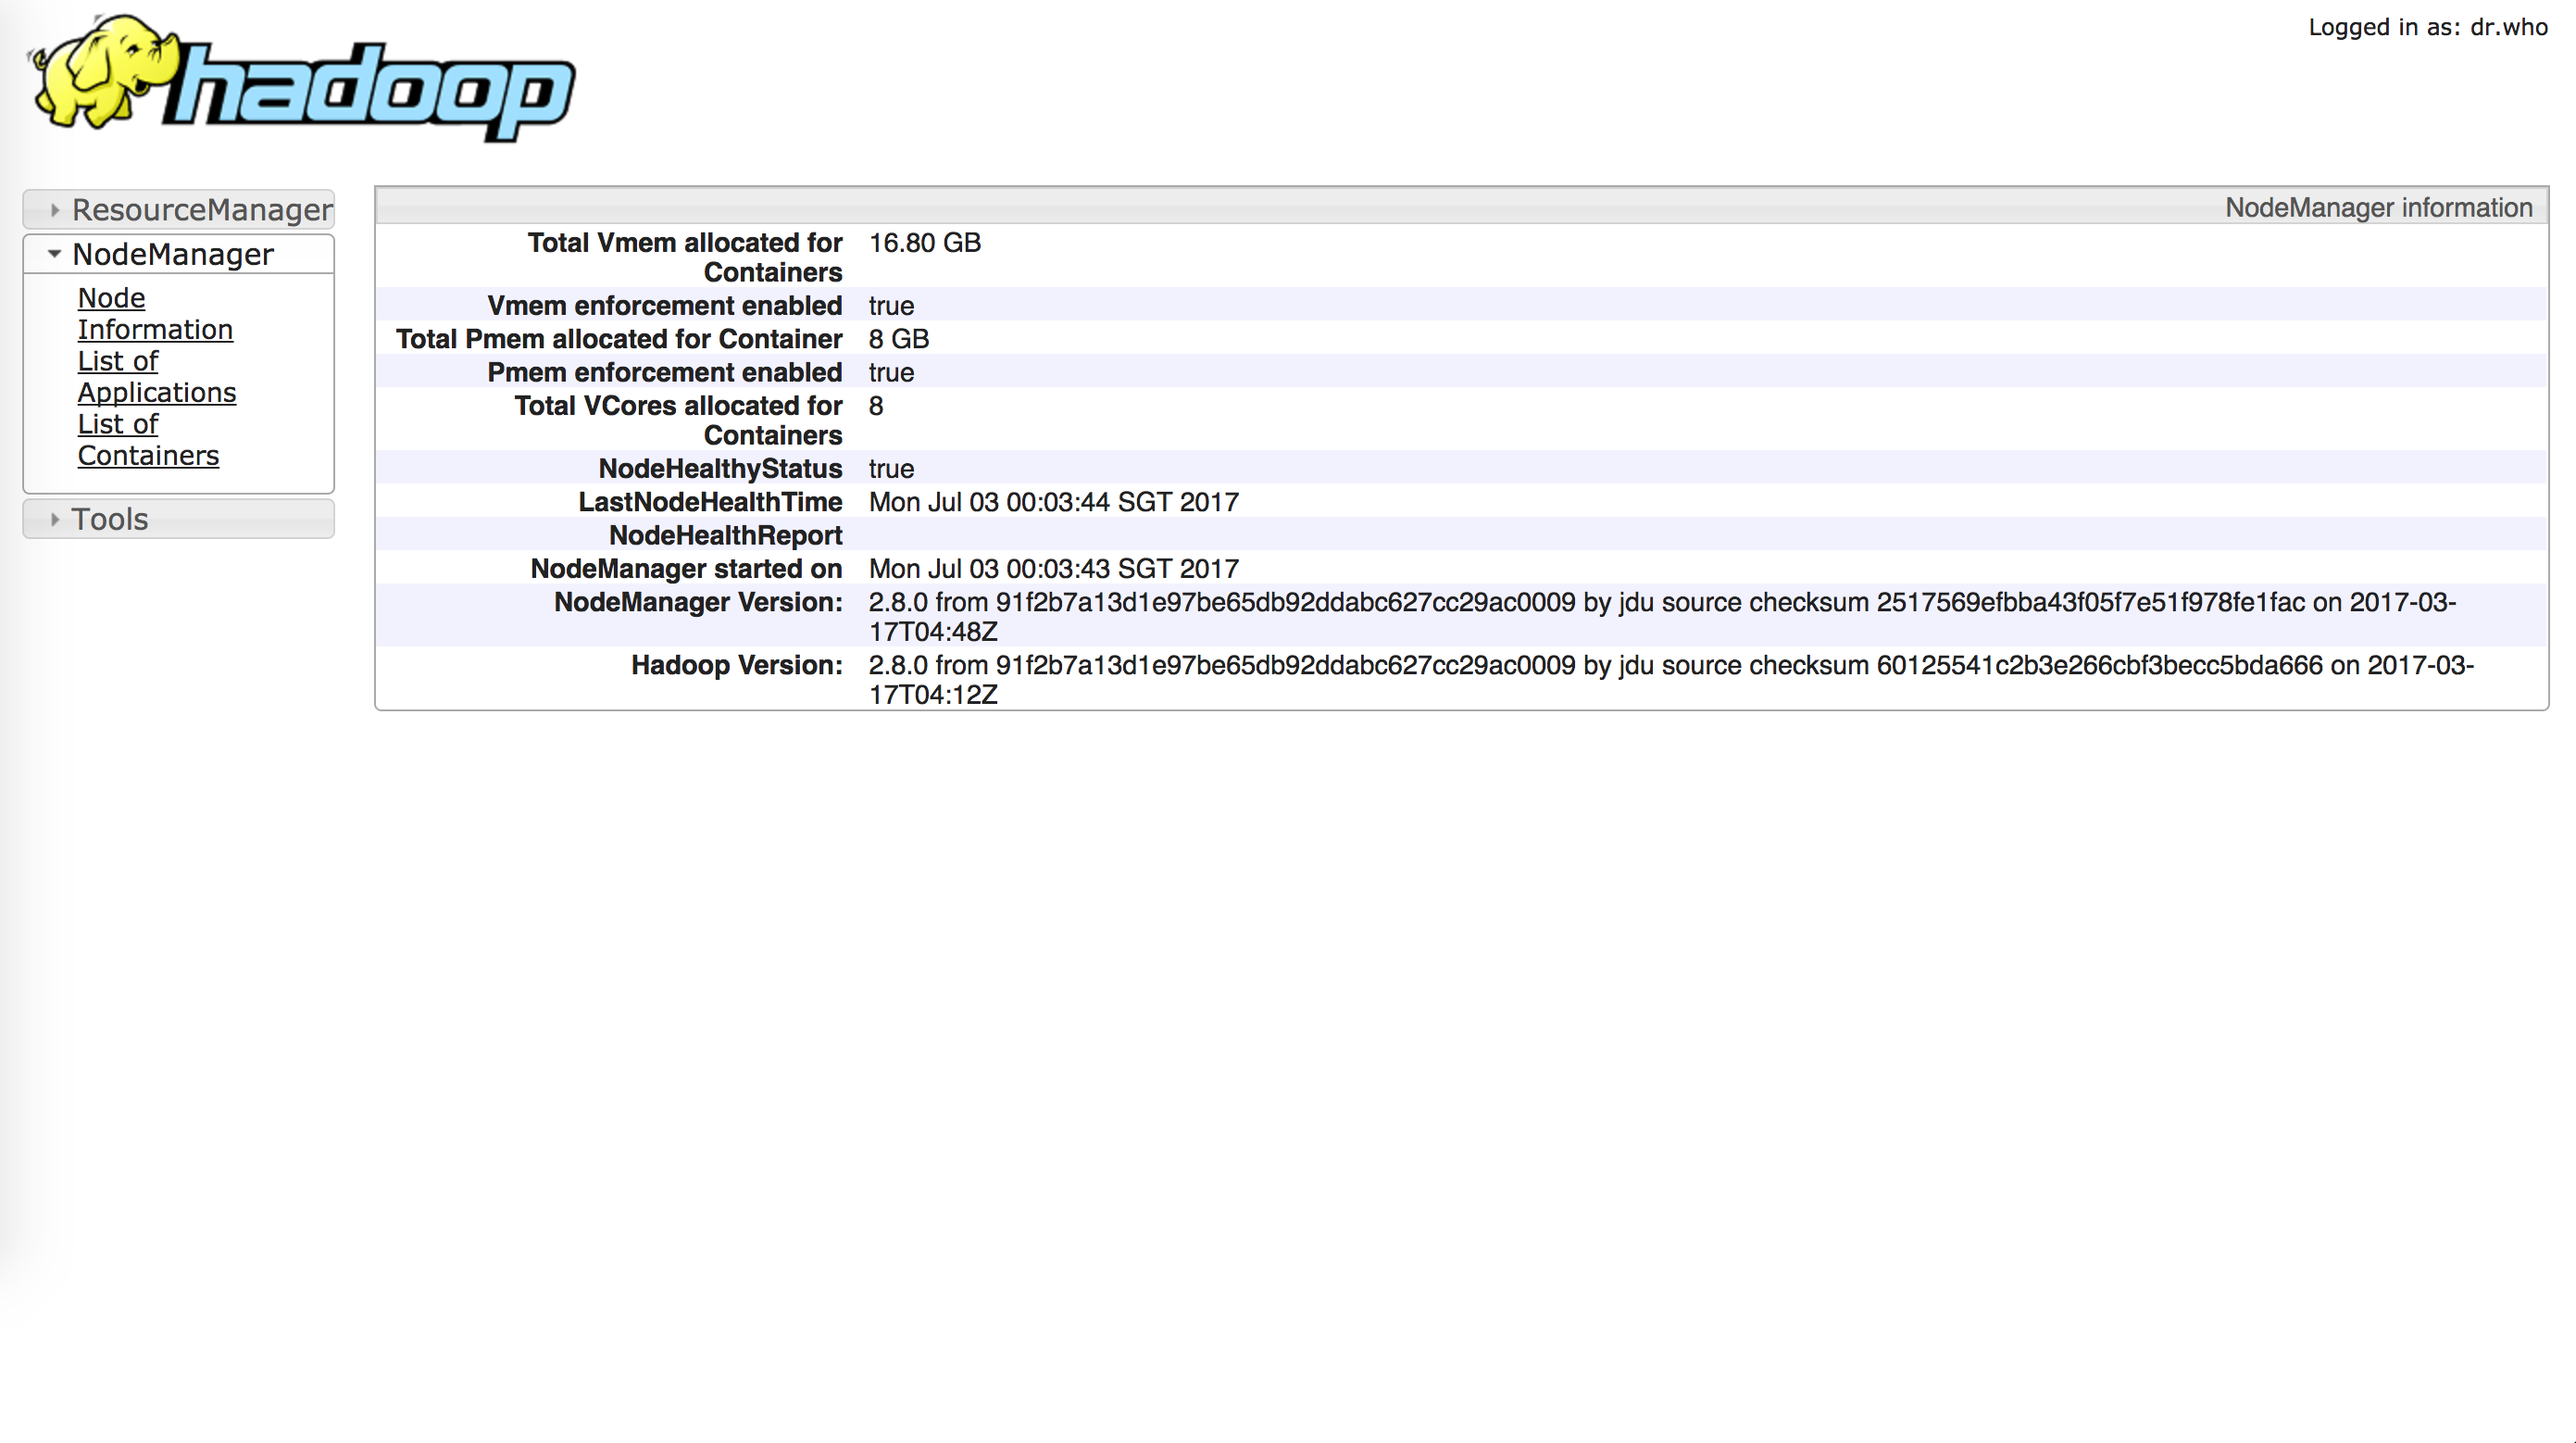
Go to the page http://localhost:8088, Specific Node Information http://localhost:8042, you will see
To stop it, just run
|
|
Thanks for these two articles which help me to figure out this problem.
https://isaacchanghau.github.io/2017/06/27/Hadoop-Installation-on-Mac-OS-X/
https://www.slideshare.net/SunilkumarMohanty3/install-apache-hadoop-on-mac-os-sierra-76275019
Install Spark
It is much more convient to install the Spark on Mac.
Firstly, download the latest Spark from http://spark.apache.org/downloads.html
Then you are done! :-) Just kidding hhhh. Move that zip to the directory that you like, as for me, I move it to the home directory.
Configure Jupyter Notebook
Open you .bash_profile, and add the following to this file.
|
|
Then source .bash_profile. You are done! I am not kidding. :P
You can now start to program with Spark in Jupyter Notebook. :-)
Useful Link here: http://spark.apache.org/docs/latest/index.html